In the present section, I will describe the steps that are required to build a robot from scratch. This method is the cheapest one (at least long term - because the start up costs are not to neglect). Building your own robot allows you to customized your design to the task at hand. This method is obviously more time consuming and requires (and exercises) a lot of patience!
In the following text, I will try to describe techniques that will reduce the costs of your projects (building your own programmer, using public domain programming tools and environments including interpreters and compilers).
There are three areas to tackle when you build a robot:
- Mechanics
- Electronics
- Programming
In the present page, I will focus mostly on what I know best, i.e. the programming aspects. I will also try to cover the basics of electronics, at least enough to get started.
First Control Board
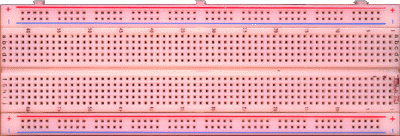
For those of you who are starting in this field, I recommend testing your circuits for the first time on prototype breadboards (see Figure). It is possible to find such breadboard in an electronics component store. The use of breadboards allows you to design a circuit quickly since you don't have to go through the pains of soldering. Some builders even integrate their breadboard directly on their robot!

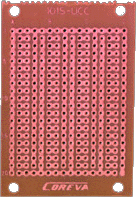
Once the circuit and tested, it is possible to implement it on a circuit board. You can use generic circuit boards such as the one shown on the Figure below or you can build your own PCB. Then, you solder the components and wires on the circuit board.

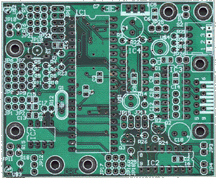
It is also possible to design its own electronic circuit schematics with a CAD program and send the resulting file to a board manufacturer to get it done. The following image shows the IGORE board created by Aaron Ramsey with the EAGLE software and manufactured by Olimex.

IGORE Board
You require the following things in order to build your first control board:
- Hardware required to build the first board (prototype board and/or circuit boards, soldering kit if required, voltmeter, wires, microcontroller, crystal, capacitors, resistors, buttons, switches, LEDs, etc.)
- A flash programmer
- A PC
- Software to control the flash programmer
- Programming tools (compiler and/or assembler, or an interpreter)
In addition, if you are using a compiler and/or an assembler, you might want to flash a bootloader on your microcontroller in order to allow the ability to download programs over the serial port (see details below).
I recommend the PIC16F877. It has a good number of I/O pins, can run at 20 MHz, uses a 8 Kb flash memory, has two PWM channels and supports a host of interfaces (RS232, I2C, SPI, etc.) and it is cheap! Other popular microcontrollers are the Atmel AVR, the 8051 and the Motorolla HC11/12.


